
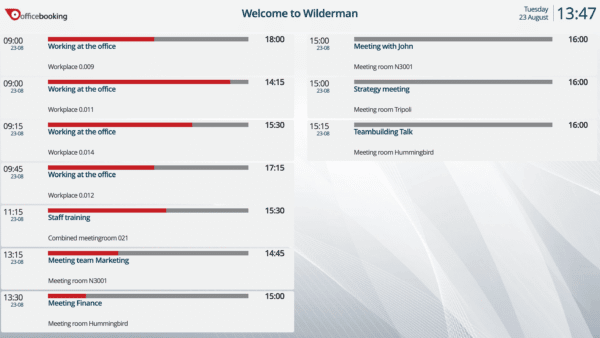
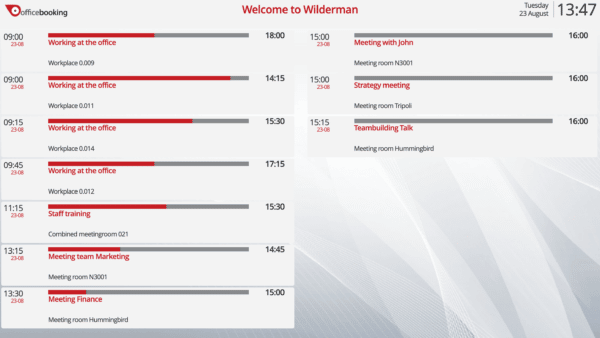
The Officebooking Bookinglist provides a complete overview of the current and upcoming meetings for today. The Bookinglist app is available within various templates and can be customized to your needs.
The Bookinglist displays all reservations, for all categories (desks, meeting rooms). Private reservations won’t be displayed.
Step 1: Access to the OfficeAdmin
This guide assumes someone in your organization (or Officebooking Support) has already created an Admin account for you. This account will give you access to the OfficeAdmin portal.
Step 2: Create a Location manager account to log in
Before you can log in to the Bookinglist app, you need a Location manager user account to log in with. Creating a user is done in the OfficeAdmin portal. It’s also possible that this account has already been created for you by an Officebooking support employee. In this case you will receive the login details from them and you can skip this step.
Within the OfficeAdmin environment you can manage the users under the heading ‘Users’ in the menu on the left. You can create a Location manager user account by clicking the ‘Add user’ button. Below we explain the mandatory fields in more detail:
- Role: when creating a device, the role must be set to ‘Location manager’. If the user is not a Location manager, the account can’t be used to log in on a Bookinglist display.
- Location: choose the location that you want to display on the Bookinglist .
- First and last name: the first and last name of the user can be used to find the user in the user overview. These names won’t be visible on the display.
- Authorized: select ‘Authorized’. Only authorized users can log in.
- User name: choose a user name for your Bookinglist user account. You will need this to log in to the Bookinglist app.
- Email: the email address is used to retrieve forgotten passwords. This field is required but not often used.
- Password: the password is used to log into the Bookinglist app along with the user name.
Select ‘Save user’ to save the Location manager user. You can now use this account to log in on the Bookinglist app.
Step 3: Open the Bookinglist app and log in
- To start the Bookinglist app, open the following url on your display: app.officebooking.net/bookinglist/
- Now log in with the Location manager account, using the user name and password that you’ve created in the previous step.
Step 4: Adjust zoom level
After logging in to the Bookinglist app the app opens to 100% zoom level automatically. When necessary adjust the zoom level of the screen to optimize the view of the reservation.
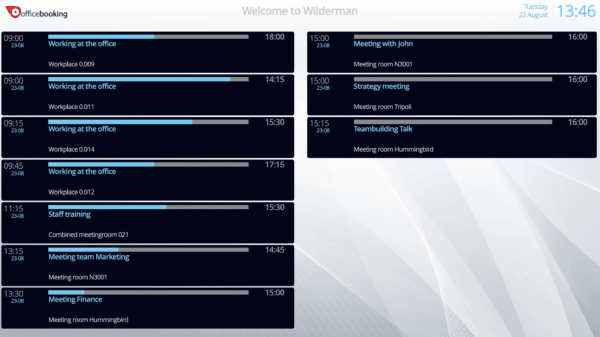
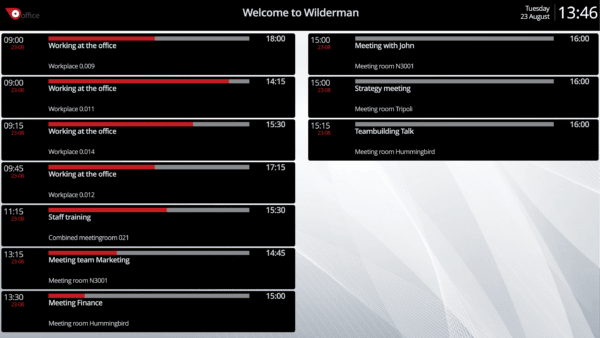
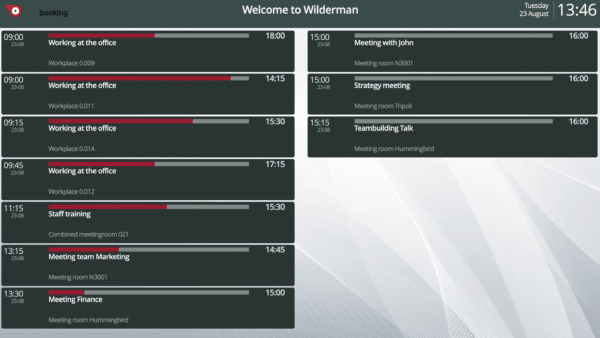
Step 5: Choose display template
The Bookinglist app will open the ‘Default’ template by default. Choose a different template to change the colour scheme.
- After you’re logged in, change the browser url to: https://app.officebooking.net/bookinglist#/power
- The last word in the url decides the template you want to use. Switch between templates to try them out.
These are the different templates:
Default. Use this url to use this template: https://app.officebooking.net/bookinglist#/default
Dark. Use this url to use this template: https://app.officebooking.net/bookinglist#/dark
Harmony. Use this url to use this template: https://app.officebooking.net/bookinglist#/harmony
Pilgrim. Use this url to use this template: https://app.officebooking.net/bookinglist#/pilgrim
Power. Use this url to use this template: https://app.officebooking.net/bookinglist#/power
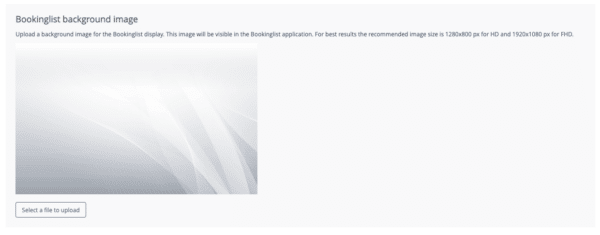
Step 6: Change background image
When opening the Bookinglist app the default background colour is grey. It’s possible to change the background by uploading a custom image via the OfficeAdmin portal.
- Open the OfficeAdmin portal.
- Navigate to the ‘Settings’ tab in the menu on your left.
- Select the tab ‘Upload images’.
- Scroll all the way down the page to upload your Bookinglist background image.
- Upload your image by selecting the ‘Select a file to upload’ button. For best results the recommended image size is 1280×800 px for HD and 1920×1080 px for FHD.
- Then select the ‘Save images’ button to save the new background image.
- Now refresh the Bookinglist view to show the new background image.