

Officebooking login works with one central login service that provides access to all various communities and single tenants. If your organisation still uses the single SSO integration to specific tenants, we recommend switching to SSO via login.officebooking.net.
Changing the SSO settings is a four-step process:
- Log in to the OfficeAdmin portal
- Update your SSO settings (Identifier and Reply URL)
- Activate the new login in the OfficeAdmin
- Test the new login service
⚠️ Important: Once you update the SSO settings in Azure AD, Google Workspace, or Okta, you must immediately complete step 2 in OfficeAdmin. Otherwise, all users will be redirected to the new service without your configuration in place.
Step 1: Log in to OfficeAdmin
Before you update SSO settings in Azure AD, Google Workspace, or Okta, make sure you can directly access the OfficeAdmin portal without needing to log in again. You’ll need this access to finalise the configuration and activate the new login service.
Step 2: Change Identifier and Reply URL
Step 2: Update SSO Settings
Follow the instructions for your SSO provider:
Microsoft Entra ID (Azure AD)
-
Log in to Entra ID
-
Go to Enterprise Applications and select your Officebooking app.
-
Navigate to Single Sign-On.
-
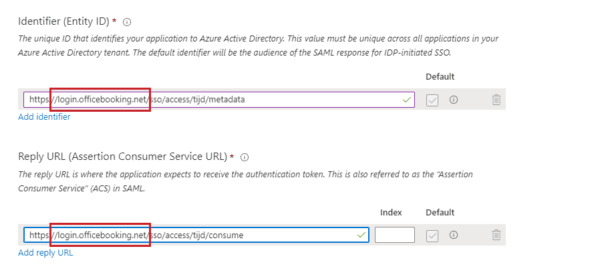
Update the URLs:
-
Identifier (Entity ID):
https://login.officebooking.net/sso/access/[ssoID]/metadata -
Reply URL (ACS):
https://login.officebooking.net/sso/access/[ssoID]/consume
-
-
Save the changes.
✅ Note: Your organisation’s
ssoIDis already set up. Only update the domain in the URLs tologin.officebooking.net.
-
Log in to Google Workspace Admin.
-
Go to Apps > Web and mobile apps and select your Officebooking app.
-
Open Service provider details.
-
Update the URLs:
-
ACS URL:
https://login.officebooking.net/sso/access/[ssoID]/consume -
Entity ID:
https://login.officebooking.net/sso/access/[ssoID]/metadata
-
-
Save the changes.
ssoID is already set up. Only update the domain in the URLs to login.officebooking.net.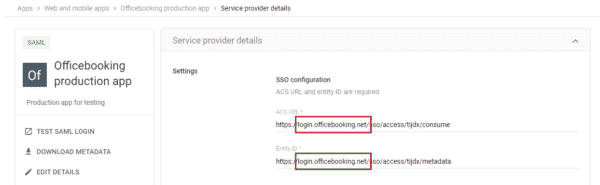
Okta
-
Log in to Okta Admin portal.
-
Select your Officebooking SAML integration.
-
Click Edit SAML Integration and go to Configure SAML.
-
Update the URLs:
-
Single Sign-On URL:
https://login.officebooking.net/sso/access/[ssoID]/consume -
Audience URI (SP Entity ID):
https://login.officebooking.net/sso/access/[ssoID]/metadata
-
-
Save the configuration.

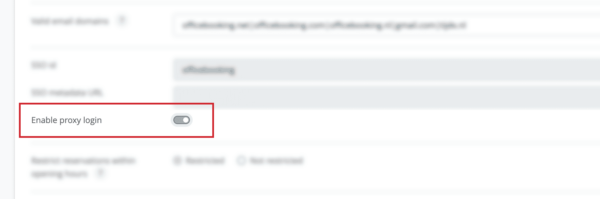
Step 3: Activate New Login in OfficeAdmin
-
Return to the OfficeAdmin portal.
-
Go to Settings > General.
-
Enable the Proxy Login toggle.
-
Save your changes.
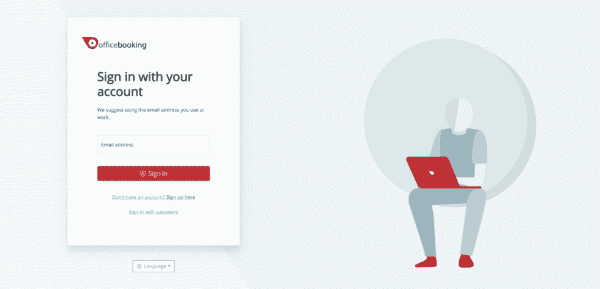
Step 4: Test the New Login Service
-
Test the configuration using the Test button in Azure AD or log in via login.officebooking.net.
-
Enter your email address (only email addresses are supported).
-
Click Sign in to be redirected to your organisation’s login page.
-
Log in using your organisation’s account credentials.
Documentation
User guide end users: Login to mobile app – new login service
User guide end users: Login to web app – new login service