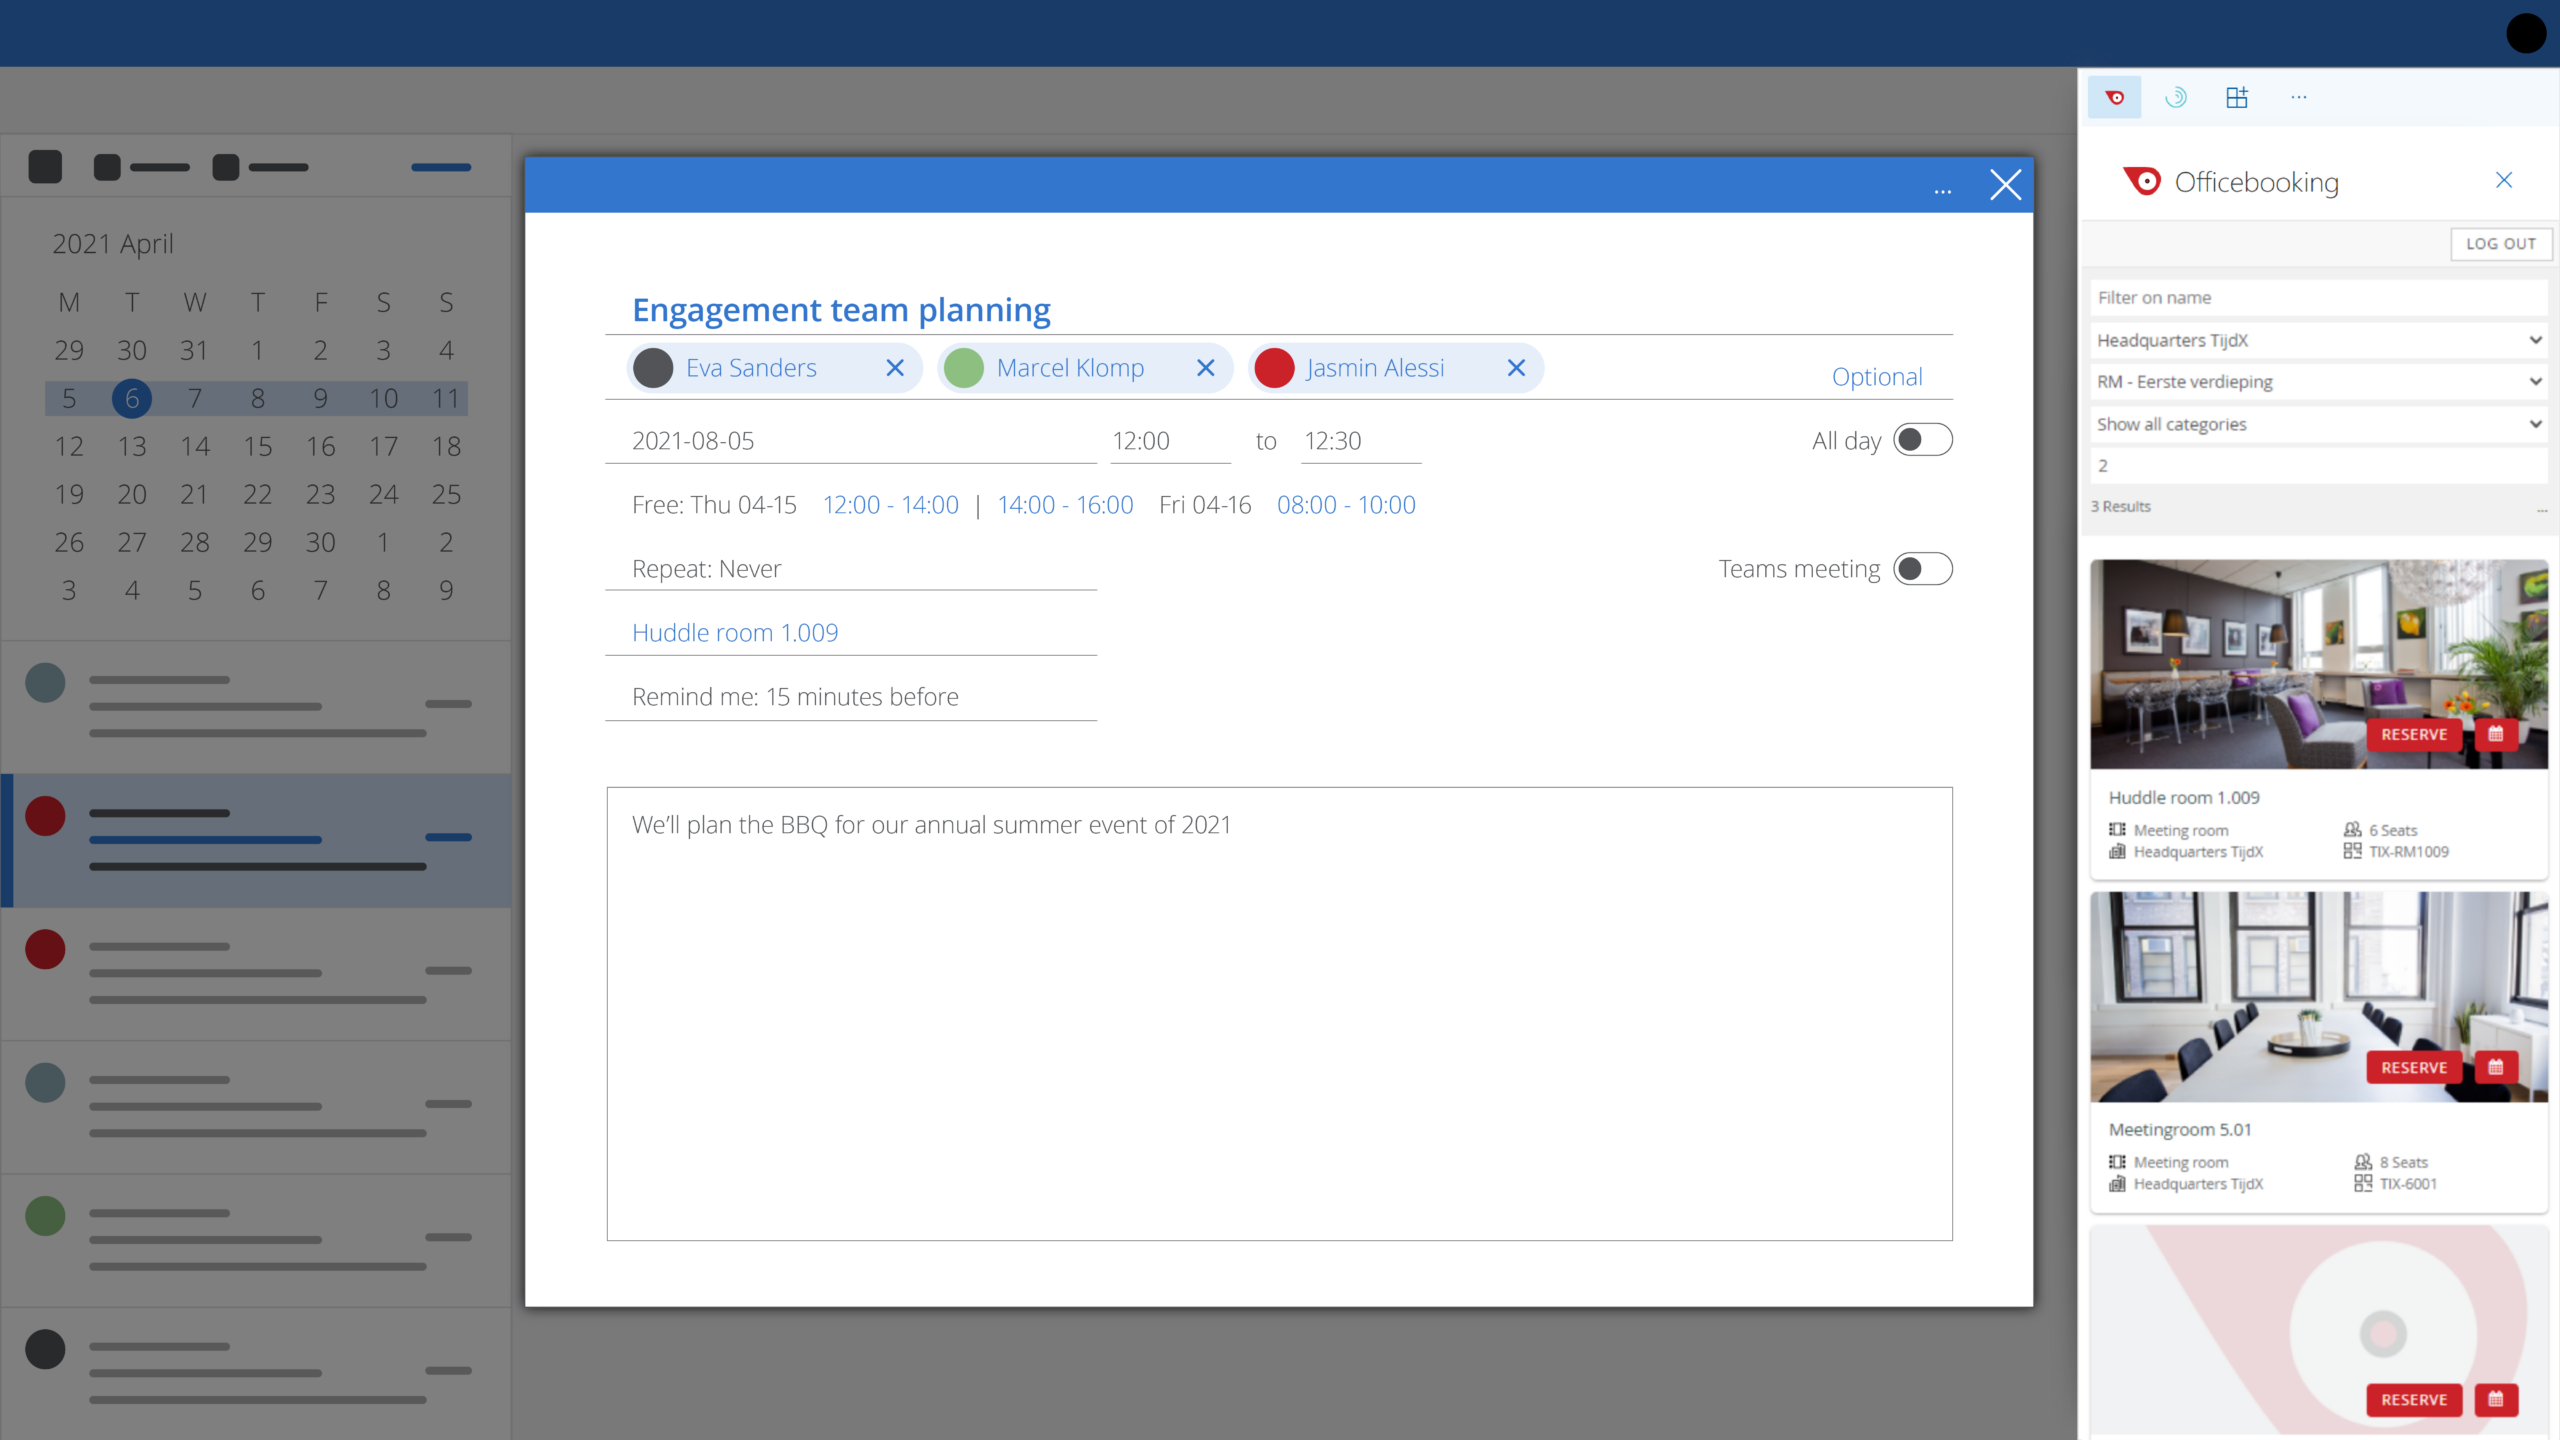
Once you’ve installed the OfficeBooking Outlook add-in, you can use it to make reservations. Follow the steps below to get started:
- Open your Outlook calendar and create a new calendar item.
- Click the app icon in the top-right to open a dropdown with your installed add-ins. Then select the OfficeBooking add-in (recognizable by the OfficeBooking logo).
- Within the Add-in you have the option to log in with Microsoft, your Officebooking account, or via Single Sign On. Just like with the mobile app or web app.
- In the Outlook add-in, you’ll see an overview of all available workplaces and rooms at your selected or default location.
- Click ‘More filters’ to access additional filtering options.
- Once you’ve found the right workplace or room click ‘Reserve’.
- A confirmation screen will appear with the reservation details.
- When you’re happy with your reservation, click ‘Reserve’ again.
- Your reservation has been saved.
Experiencing (calendar) synchronization issues? Read this article for troubleshooting tips.