
Creating multiple reservations at the same time (for the same time) has recently become available for Admins and Location Managers, via the web app. Note: the reservations are all created on the name of the person who creates the reservations via the Multi mode. It’s not possible to create reservations in someone else’s name with the Multi mode.
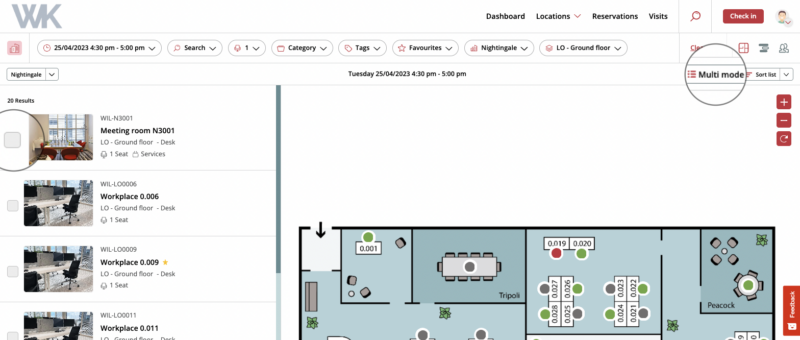
- Navigate to the floor plan view in the web app and select the correct floor.
- Select the correct date and time for which you want to book the multiple desks. This will not be adjustable again in the reservation pop-up, so you have to do this first.
- Select the ‘Multi mode’ button. Now this mode is active and you can select multiple desks at once.
- Select the multiple boxes of the desks you want to book.
- Once all your desks have been selected, select the ‘Reserve selection’ button.
- Now the reservation pop-up opens. Here you enter a title for the reservation.
- Now select the button ‘Save reservation’ to save the reservations. The system makes a separate reservation for each selected desk, under your name. These reservations will always be visible on the ‘Reservations’ screen in the menu.
After creating the multiple reservations, you will receive a confirmation email with an overview of the multiple reservations.