VIP meetings require special attention and treatment due to the importance of the attendees. Recognizing a VIP meeting within a reservations system can help you prioritize and provide exceptional service to these distinguished individuals. In this article, we will explain how to recognize VIP meetings.
Planner View
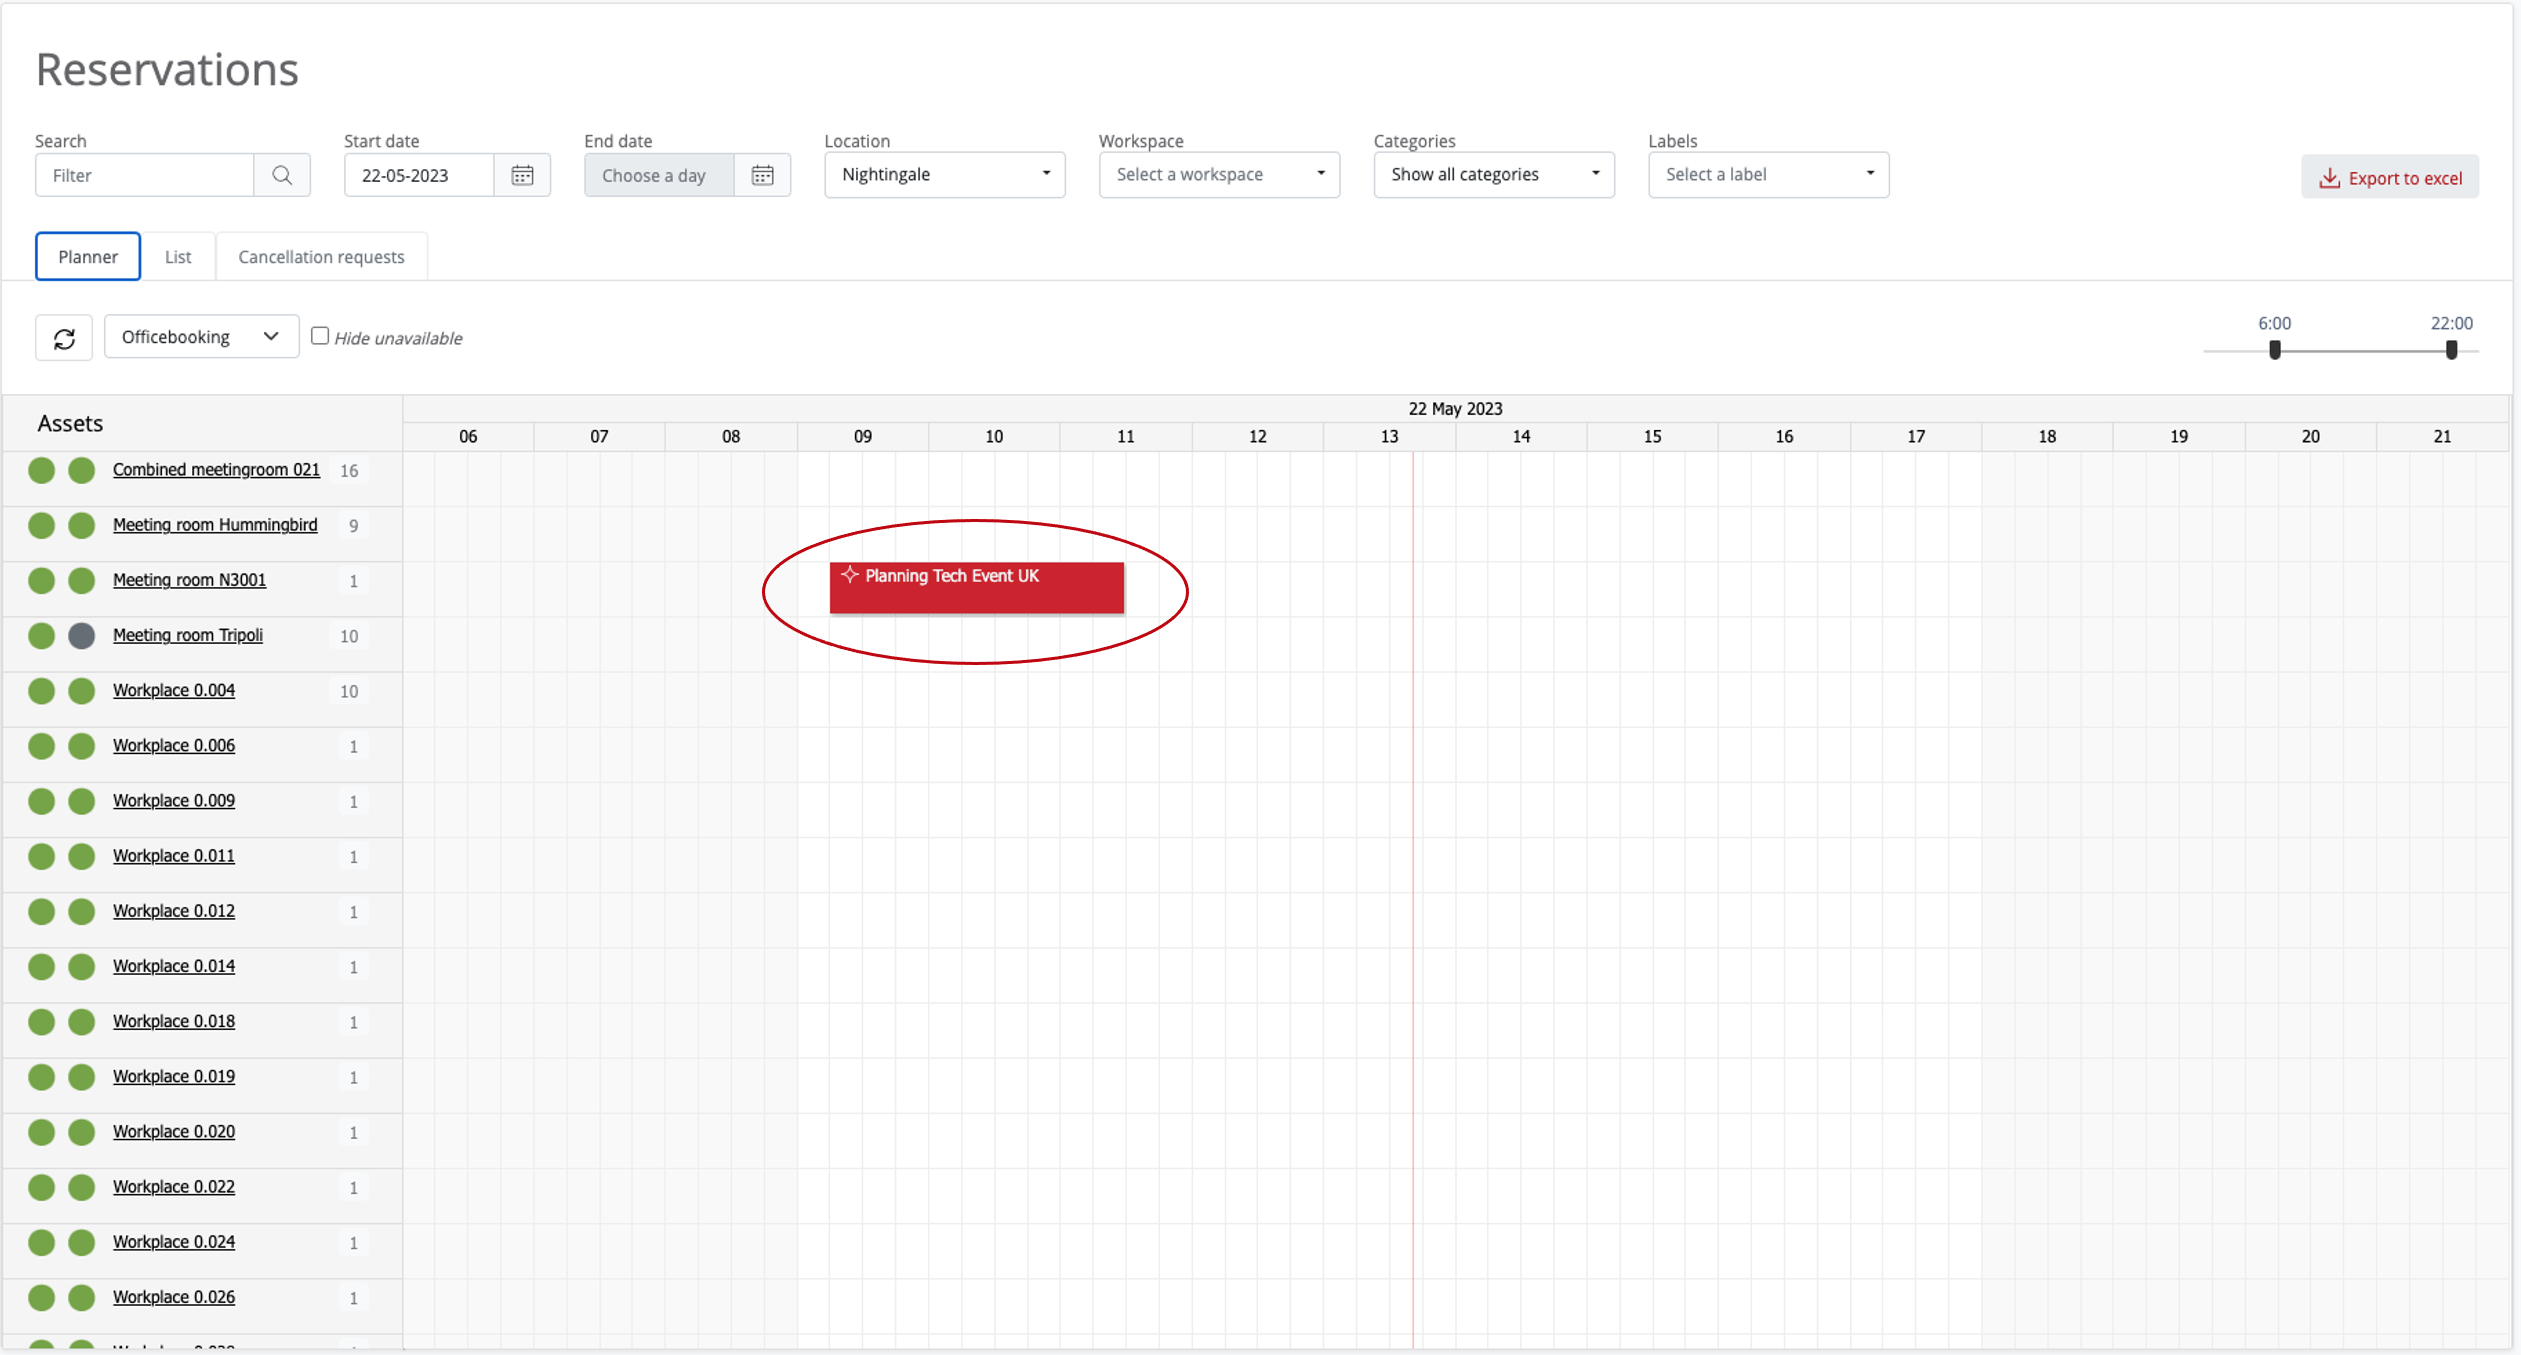
The planner view within the ‘Reservations’ tab provides a visual representation of scheduled meetings. To recognize VIP meetings in this view, follow these steps:
- Navigate to the ‘Reservations’ tab on the left side of the dashboard.
- Once in the ‘Reservations’ tab, select the option ‘Planner’ view. This view will display the scheduled meetings on a calendar layout.
- In the planner view, scheduled meetings are represented by red blocks. Within the red-coloured blocks, if a meeting is designated as a VIP meeting, a star icon will be displayed on the left of the reservation title. The star symbolizes the VIP status of the reservation.

List View
The list view in the ‘Reservations’ tab provides a comprehensive list of all scheduled meetings. To recognize VIP meetings in this view, follow these steps:
- Navigate to the ‘Reservations’ tab on the left side of the dashboard.
- Within the ‘Reservations’ tab, select the option ‘List’ view. This view presents a detailed list of scheduled meetings.
- In the list view, identify the column labelled ‘Actions’ on the right side of the screen. This column provides additional information for each reservation.
- Under the ‘Actions’ column a checkmark will be displayed under the star icon. This indicates that the meeting is recognized as a VIP reservation.

